The Brighton Rust group has been learning how to run Rust programs “bare metal” on embedded hardware. That is, hardware without any operating system: an Arm chip, some memory, the odd button and a few LEDs.
Tim kindly lead us through “hello world”, and these are my notes on what we did, specifically on macOS. I’ve added in a few comments after ducking around after the event.
The plan
We’re working with a STM32 Nucleo-64 device:
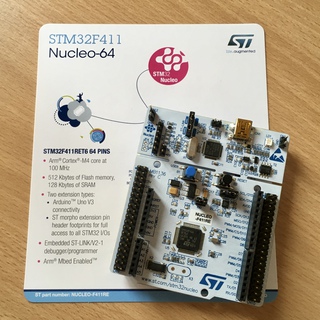
This one has an Arm Cortex-M4 chip plus a programmer/debugger so we can send it compiled code, and debug the code as it runs. More on the hardware and what all that means later.
In the first session we:
- installed the Arm targets into Rust, so we can compile Arm code on our Intel laptops;
- set up an emulator to run the code;
- reconfigured the project to run on the (slightly different) architecture of the real hardware; and
- ran it to see “hello world” down the debugging channel.
Running in the emulator
The steps to follow are all in the The Embedded Rust Book, but below I’m showing the commands I used for macOS.
To start out, we worked with an existing template project created with a cargo generate command.
This particular template is set to run on the Cortex-M3 architecture,
so we need to install that:
$ cargo install cargo-generate
$ rustup target add thumbv7m-none-eabi
We also installed the QEMU emulator, and Rust tools to give us commands to work with GDB:
$ brew install armmbed/formulae/arm-none-eabi-gcc
$ brew install openocd
$ brew install qemu
$ cargo install cargo-binutils
$ rustup component add llvm-tools-preview
openocd is the Open On-Chip Debugger, which is a bridge between GDB and the hardware.
With those dependencies in place, we can create a project:
$ cargo generate --git https://github.com/rust-embedded/cortex-m-quickstart
🤷  Project Name: p1
🔧   Creating project called `p1`...
✨   Done! New project created /Users/richard/tmp/p1
The hello world code we’re using is:
#![no_main]
#![no_std]

extern crate panic_halt;
use cortex_m_rt::entry;
use cortex_m_semihosting::{debug, hprintln};

#[entry]
fn main() -> ! {
    hprintln!("Hello, world!").unwrap();
    debug::exit(debug::EXIT_SUCCESS);
    loop {}
}
Parts of that code are unfamiliar to me, but I’ll come back to that in a minute. For now, compile the code:
$ cd p1
$ cargo build --target thumbv7m-none-eabi
Double-checking we’ve compiled to Arm architecture:
$ file target/thumbv7m-none-eabi/debug/p1
target/thumbv7m-none-eabi/debug/p1: ELF 32-bit LSB executable, ARM, EABI5 version 1 (SYSV), statically linked, with debug_info, not stripped
We can change the behaviour of cargo run to execute the emulator, but I ran this code manually as:
$ qemu-system-arm -cpu cortex-m3 \
  -machine lm3s6965evb \
  -nographic \
  -semihosting-config enable=on,target=native \
  -kernel target/thumbv7m-none-eabi/debug/p1
Hello, world!
First win there: we can compile and emulate embedded code.
The source code
Going back to the code, there were a few new things I’d not seen before.
The #![no_std] attribute opts out of the Rust standard library.
That’s because the standard library assumes we have I/O interfaces and other items provided by an operating system. But we don’t have an operating system on the hardware.
What we get instead is a core library giving us the essentials of Rust.
Tim pointed out that you can run a Real Time Operating System on this kind of hardware. However, using “bare metal” Rust means you can make use of the borrow checker and type system to give safe access to registers and other mutable state.
The extern crate panic_halt line is selecting how we want to handle program panics.
A panic is something you might do in code, and the behaviour is defined in Rust with a standard library.
Without the standard library, we get to pick what behaviour we want.
The panic_halt causes the process to loop forever.
I guess we can write our own if we wanted to, but there are already a bunch to pick from.
I can sort of see why #![no_main] is used.
The signature of the main takes an array of arguments.
We’re not going to have that, so sure, we’ll need to do something else.
Related to that is the #[entry] attribute.
That comes from one of the library dependencies, listed out in Cargo.toml:
cortex-m = "0.6.0"
cortex-m-rt = "0.6.10"
cortex-m-semihosting = "0.3.3"
panic-halt = "0.2.0"
The documentation for cortex-m-rt gives the details for entry, stating it’s called by the reset handler, which I guess is part of the Arm architecture.
The signature of that main is () -> !.
The ! there is the bottom type, called Never in Rust.
There are no values with this type: it is “not inhabited”, as opposed to the Unit type that
has exactly one value, or a bool type that has two (true, false).
Never is used to signify a diverging function, which is one that doesn’t return normally (perhaps looping forever). As our program is the only thing running on the hardware, chances are we don’t want it to stop.
Finally, hprintln! and debug are from the “semihosting” package.
Semihosting allows the Arm processor to make use of I/O on the host computer (i.e., my laptop).
In other words, we see debug output on a laptop terminal window without any extra cables.
The hprintln! does what you think it does, and the debug::exit reports a success status code back to the debugger.
Running on the hardware
Next up is to reconfigure the project to run on the real hardware. We need to install the Cortex-M7F target with hardware floating point:
$ rustup target add thumbv7em-none-eabihf
Now there are a lot of names and numbers floating around. “thumbv7em-none-eabihf”? STM32? Nucleo-64? Here’s what they’re all about:
- A platform (compile target) name is a “target triple”: architecture-vendor-OS.
The above target is:
thumbis an instruction set from Arm, so this is the ARMv7E-M architecture (a microcontroller profile)nonefor the vendor, for reasons I don’t understandeabihfis made up of Embedded Application Binary Interface (a standard to layout data in a chip’s memory and registers so that different pieces of software can inter-operate) andhffor floating point hardware.
- The hardware is STM32F411RE:
- ST is the name of the company that makes the hardware
- 32 because it’s a 32 bit processor
- F4 means it’s based around the Arm Cortex-M4F
- The other numbers is a specific variant from their range.
- Nucleo-64 seems to be a brand name and form factor, where the 64 number refers to the number of pins on the board.
Ok. So we have the right platform installed for the hardware we have.
We’re going to recompile the project, but first we need to make a few configuration changes:
- modify Cargo configuration so that
cargo runflashes the program to the hardware; - fix the
memory.xfile to match the hardware (how much memory there is, where it is mapped to in the address space); and - modify the openocd config for the hardware we’re using.
I’ve put these changes in a pull-request against the code I ended up with.
To fire the code down to the hardware and log the results, the sequence is:
- Plug in the hardware (via a USB mini-B cable)
- Start
openocd cargo run
It looks like this:
I should have removed the debug::exit call, apparently, but I didn’t.
One for next time.
Finally…
All of this is in the Rust Embedded book, along with plenty more. Well worth browsing.
The code I’ve used is in a repository on Github.
Thanks to Tim for suggestions on improving this post.