Building on what we learned about RTFM last week, we converted our blinky code to use the RTFM scheduling facilities.
Overview
The goal was to blink the device LED on and off. We’ve done that before, but using a loop to tie up the CPU for (say) a second between the LED blinks. This time we’ll use RTFM to schedule the LED for us. That will allow us (in future session) to do other things at the same time, such as reading input to control the LED.
As an outline, here’s what we ended up with:
we grabbed access to an LED, some faster logging, and a flag to indicate if the LED should be on or off;
stuffed them into an RTFM resource structure; and
scheduled a function to be run once a second to access the resources and control the LED.
I paired up with franssl this week, and the code I’m presenting is based on what you’ll find over in their repository. For me, this week was about just getting it to work, and then rationalising how it worked afterwards (which is what I’m doing right now).
Code
The code I’m working with here is in a Github repository. Here’s the relevant parts of main.rs, which I’ll explain next:
use crate::hal::{prelude::*, stm32};
use stm32f4xx_hal as hal;

// Imports to reduce length of type signatures in the code
use hal::gpio::gpioa::PA5;
use hal::gpio::{Output, PushPull};

use cortex_m::iprint;

use rtfm::cyccnt::U32Ext;

const PERIOD: u32 = 48_000_000; // 48mhz

#[rtfm::app(device = stm32f4xx_hal::stm32, peripherals = true, monotonic = rtfm::cyccnt::CYCCNT)]
const APP: () = {
    struct Resources {
        led: PA5<Output<PushPull>>,
        is_on: bool,
        itm: cortex_m::peripheral::ITM,
    }

    #[init(schedule = [blinky])]
    fn init(mut cx: init::Context) -> init::LateResources {
        // Device specific peripherals
        let dp: stm32::Peripherals = cx.device;

        // Set up the LED: it's connected to pin PA5 on the microcontroler
        let gpioa = dp.GPIOA.split();
        let led = gpioa.pa5.into_push_pull_output();

        // Set up the system clock. We want to run at 48MHz
        let rcc = dp.RCC.constrain();
        let _clocks = rcc.cfgr.sysclk(48.mhz()).freeze();

        // Initialize (enable) the monotonic timer (CYCCNT) on the Cortex-M peripherals
        cx.core.DCB.enable_trace();
        cx.core.DWT.enable_cycle_counter();
        let itm = cx.core.ITM;

        cx.schedule.blinky(cx.start + PERIOD.cycles()).unwrap();

        init::LateResources {
            led,
            is_on: false,
            itm,
        }
    }

    #[task(schedule = [blinky], resources = [led, itm, is_on])]
    fn blinky(cx: blinky::Context) {

        // Local alias to the reosurces, which are &mut
        let is_on = cx.resources.is_on;
        let led = cx.resources.led;

        // The ITM port for logging:
        let port = &mut cx.resources.itm.stim[0];

        if *is_on {
            led.set_high().unwrap();
        } else {
            led.set_low().unwrap();
        }
        *is_on = !(*is_on);

        let next = cx.scheduled + PERIOD.cycles();
        iprint!(port, "{:?}", next);
        cx.schedule.blinky(next).unwrap();
    }

    extern "C" {
        fn USART1();
    }
};
Resources
The first difference from last time is that we’re declaring a resource structure:
struct Resources {
    led: PA5<Output<PushPull>>,
    is_on: bool,
    itm: cortex_m::peripheral::ITM,
}
As the RTFM manual describes,
resources gives us a way to share data between parts of our programme.
In our case it’s between the init function at start up,
and the blinky function we’ll write to turn the LED on and off.
Specifically, these are “late resources”, which means values not known at compile time.
The structure is initialized at the end of init by wrapping the values we want to use in init::LateResources.
The last value of the function is the return value.
We need access to the LED itself, we’re using a flag to indicate if the LED is currently on (or not), and a port for logging.
Regarding logging, the ITM (Instrumentation Trace Macrocell) logging is just way faster than the semi-hosted logging (hprint!) we’ve used up to now.
It is, however, an option feature, and not all Arm processors support it. Ours does. There’s tons of information about ITM in the The ITM and the quest for faster logging post.
What it means in practice is we can use iprint! or iprintln! with a specific port and the output appears much faster in a file called itm.txt.
That’s all configured in openocd.gbd.
By default the values in the Resources struct are &mut.
You can change that, but it’s perfect for us because we need to write to the LED, the ITM port, and flip the is_on bool.
Init
The init function is pretty straightforward. It grabs the resources, and schedules a LED blink.
In order to do the scheduling, you have to declare what you want to schedule in an attribute:
#[init(schedule = [blinky])]
fn init(mut cx: init::Context) -> init::LateResources {
  // etc
}
One thing that tripped us up was forgetting to enabling the timer. Without this block of the code, nothing was scheduled:
// Initialize (enable) the monotonic timer (CYCCNT) on the Cortex-M peripherals
cx.core.DCB.enable_trace();
cx.core.DWT.enable_cycle_counter();
I’d also missed the RT feature in my Cargo.toml:
stm32f4xx-hal = { version = "0.6.0", features = ["stm32f411", "rt"]}
…and without that, which appears to be needed to enable interrupts to be used, nothing would schedule for me.
The scheduling itself is this line:
cx.schedule.blinky(cx.start + PERIOD.cycles()).unwrap();
I would have expected to have a schedule function that took some other function as an argument.
But it’s apparent that RTFM makes use of macros to give you calls like schedule.blinky.
The argument is a duration of when blinky should run, in clock cycles.
We set this to one second via a constant PERIOD of 48,000,000.
On the day this all worked, but our scheduling would stop after a while. It looked like it could be an arithmetic overflow problem, as it would stop right after scheduling for a time suspiciously close to a power of 2 boundary. We didn’t resolve this on the night, but it lead to a discussion resulting in Tim pointing us to the excellent Myths and Legends about Integer Overflow in Rust.
The problem went away by either:
building in
--releasemode (see the Myths article for why); orupgrading to the non-beta version of RTFM (so maybe it was a defect).
Blinky
The function to turn the LED on and off also needs to declare what it wants to schedule, and what resources it wants to access:
#[task(schedule = [blinky], resources = [led, itm, is_on])]
fn blinky(cx: blinky::Context) {
  // etc
}
With this in place we can read and write to is_on and friends,
and schedule ourselves to be called again.
Interrupts
Finally, we also need to define a free interrupt for the schedule to use:
extern "C" {
    fn USART1();
}
Missing this out was a compile error, but it took us a while to figure out what we could use here (from the stm32f411xx crate). Also the timer queue documentation was useful.
Alternative
For fun, I tried an alternative version of the code to reduce the amount of mutation going on. It’s in a ping pong branch and what it does is:
schedule a function called
lights_onduringinit;lights_onturns on the LED, then schedules a function calledlights_off; andlights_offturns off the LED, and scheduledlights_on.
It works. I kind of like it.
Tooling
For all these weeks, I’m primarily using Visual Studio Code for development:
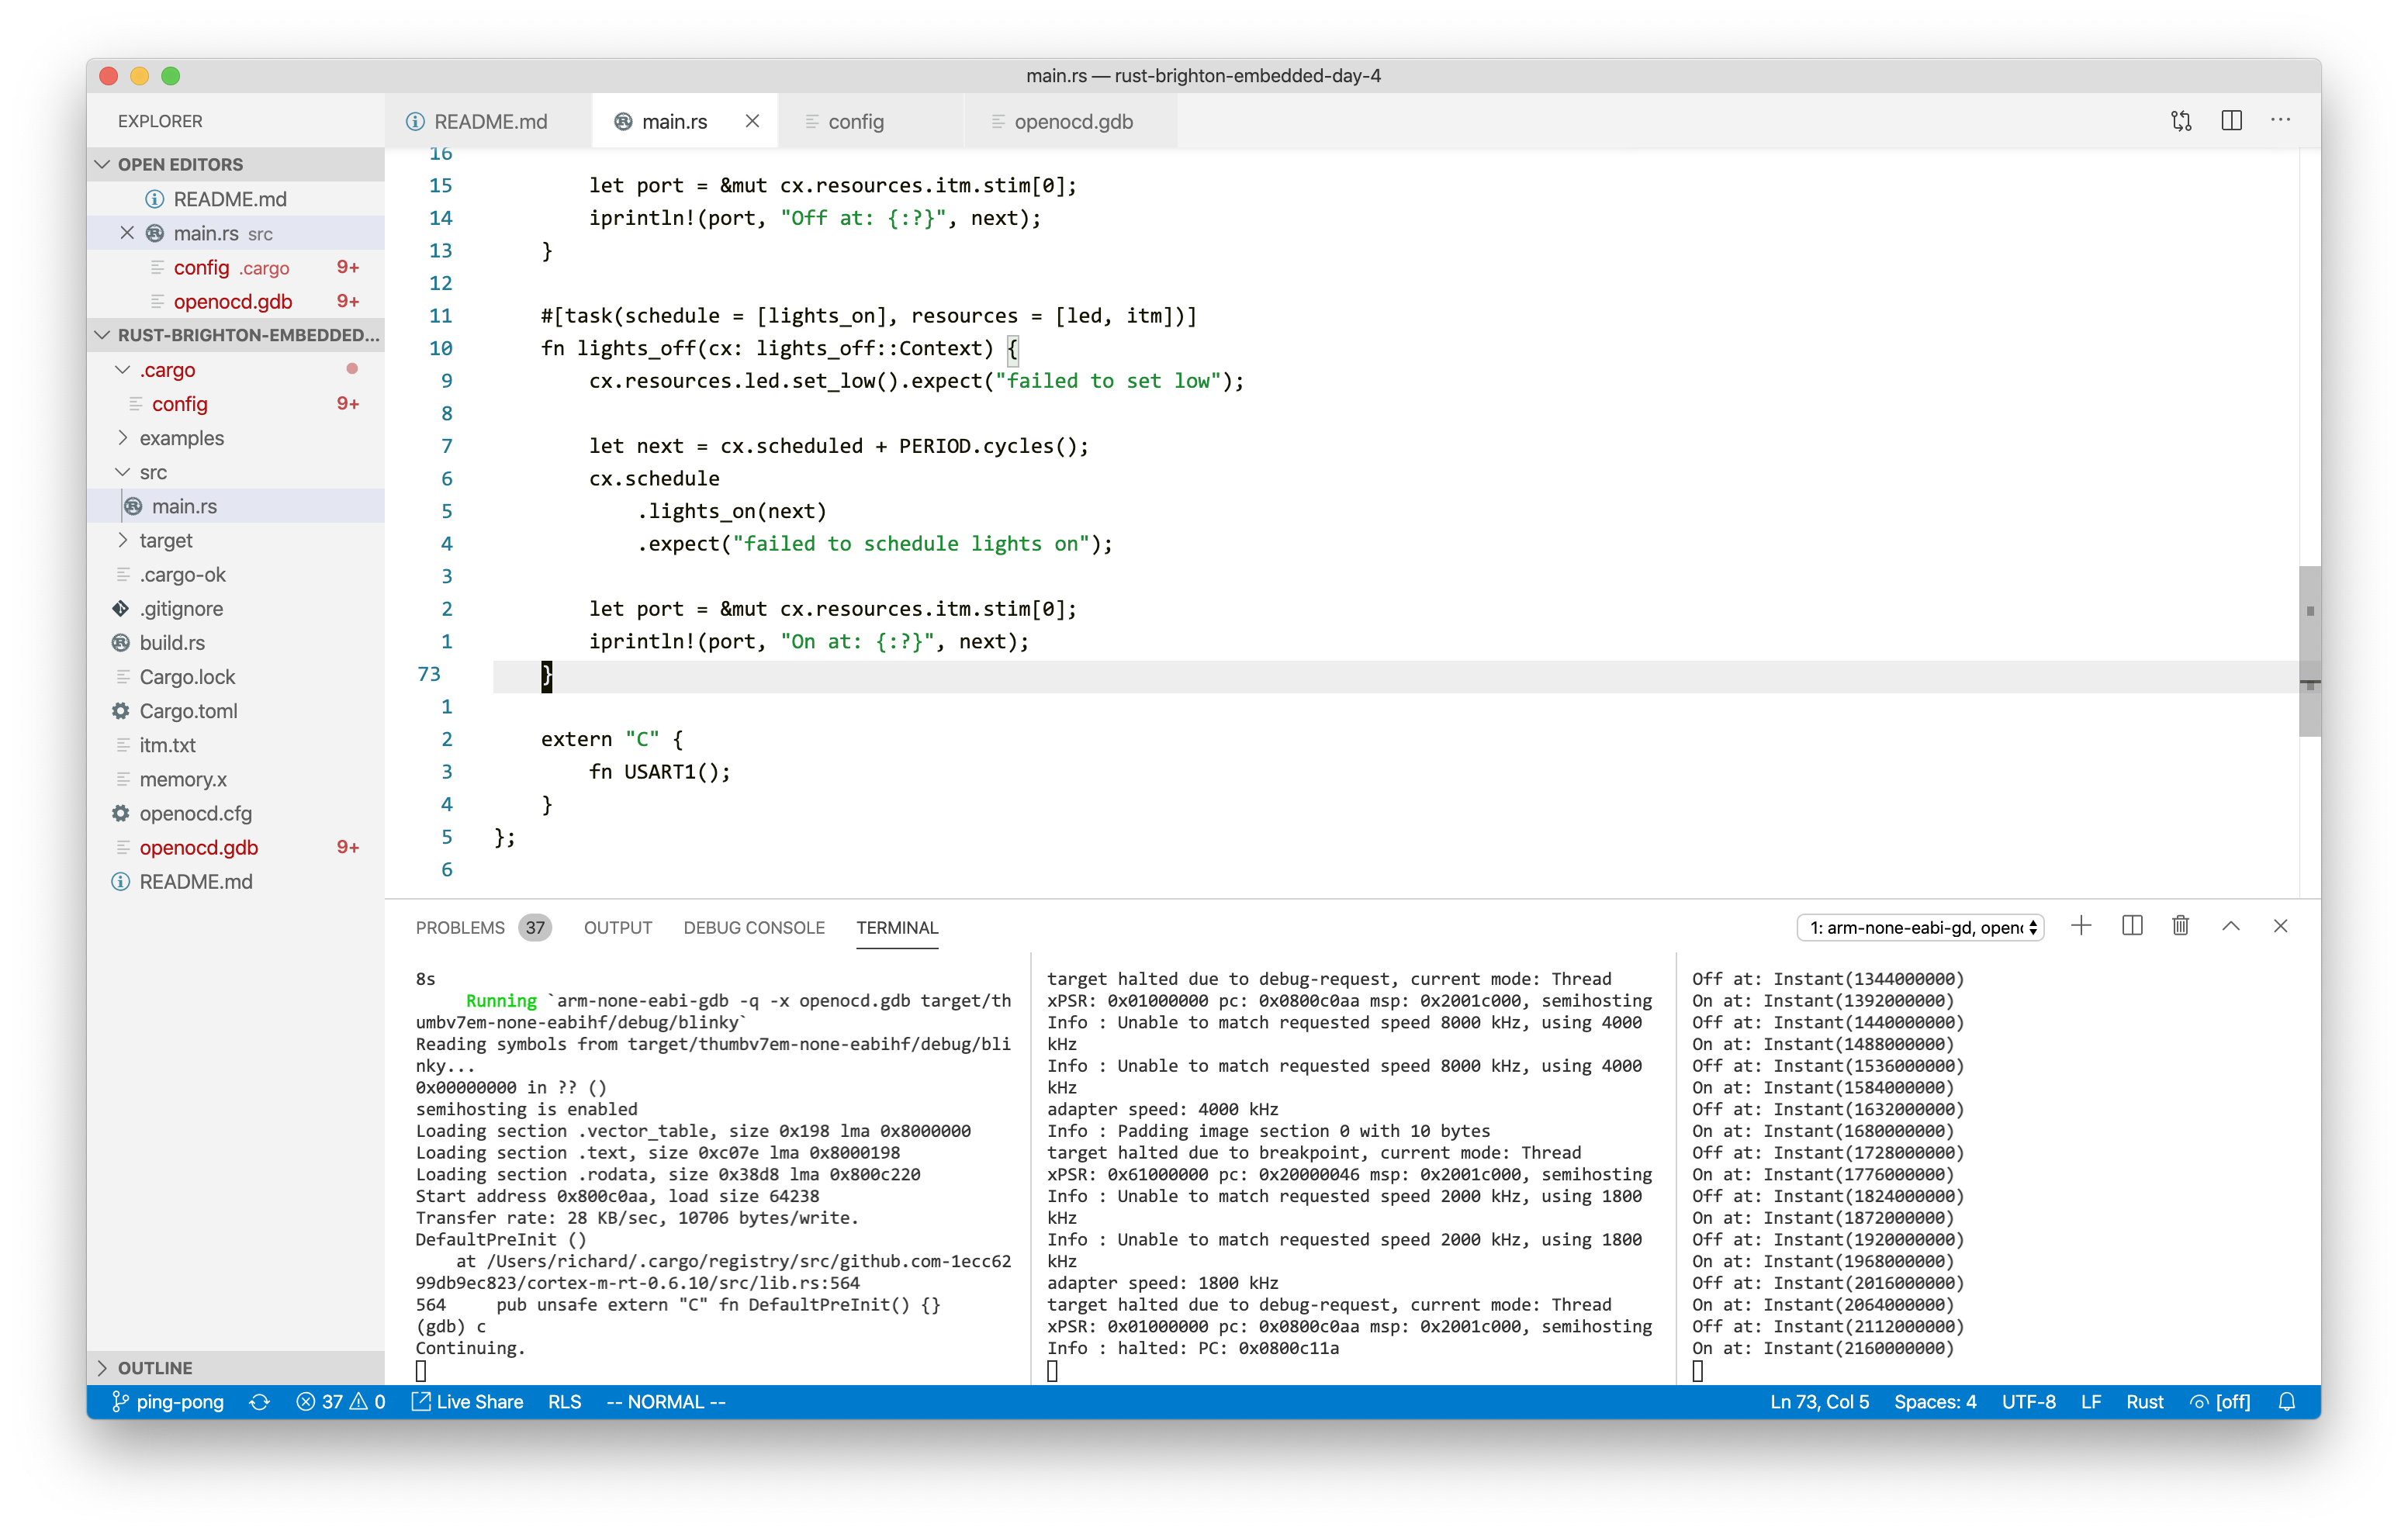
Just three notes:
code navigation works pretty well, but isn’t much help with macro-generated code;
having compile on save gives a nice fast development experience; and
this week I was shown you can have split terminals in the editor (left to right:
cargo run,openocd,tail -f itm.txt)
Summary
We now schedule a blink using interrupts and timers provided via the RTFM framework.
I found the heavy use of attributes and macros to be hard to follow. But since the session I’ve had a look at the cortex-m-rtfm documentation. That helps explains much of what’s happening.
Running the code produces the same effect as last week, but we can now (in principle) have the hardware do something else while controlling the LED.